
Creating a single page website in ExpressionEngine
This tutorial series is designed to take a simple step-by-step approach to learning how EE works. It is only going to cover setting up a site AFTER you have installed ExpressionEngine in whatever environment you choose. The user guides at https://ExpressionEngine.com&n... the setup very well. Each tutorial will build on the previous one in order to hopefully make sense of the options for setup.
*One note: When I created my fresh install I DID NOT install the default template. Although it is good for learning, I felt as though it would only complicate this process.
BASIC SETTINGS
Once you have your basic install done, log into your Control panel at http://yoursitename.com/admin.... and then go to the Settings Page. For simplicity, the only settings we are going to cover to begin with are the “General Settings” and the “URL and PathSettings”.
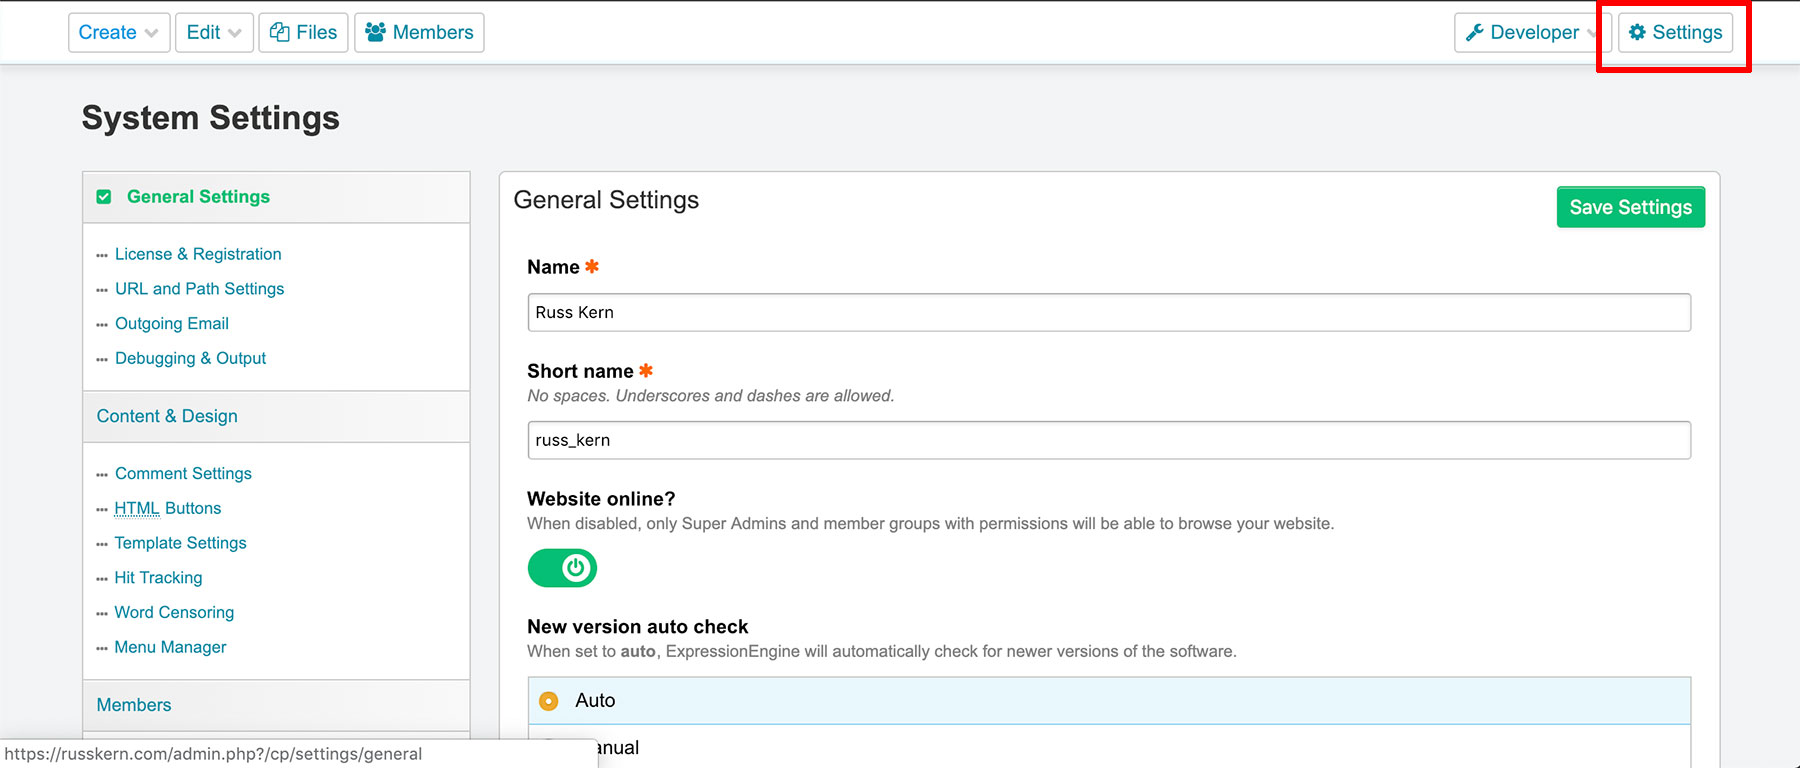
GENERAL SETTINGS
On this screen you will want to give your site a “Name” and a “Short Name”. You can leave the default short name in if you like. I rarely change it but I suppose it isn’t a bad idea to give it a name similar to your site name. (for example: Site Name: EE Tutorial, short_name: ee_tutorial). The short_name is the name of the directory that all your Template files will be stored in on your web server.
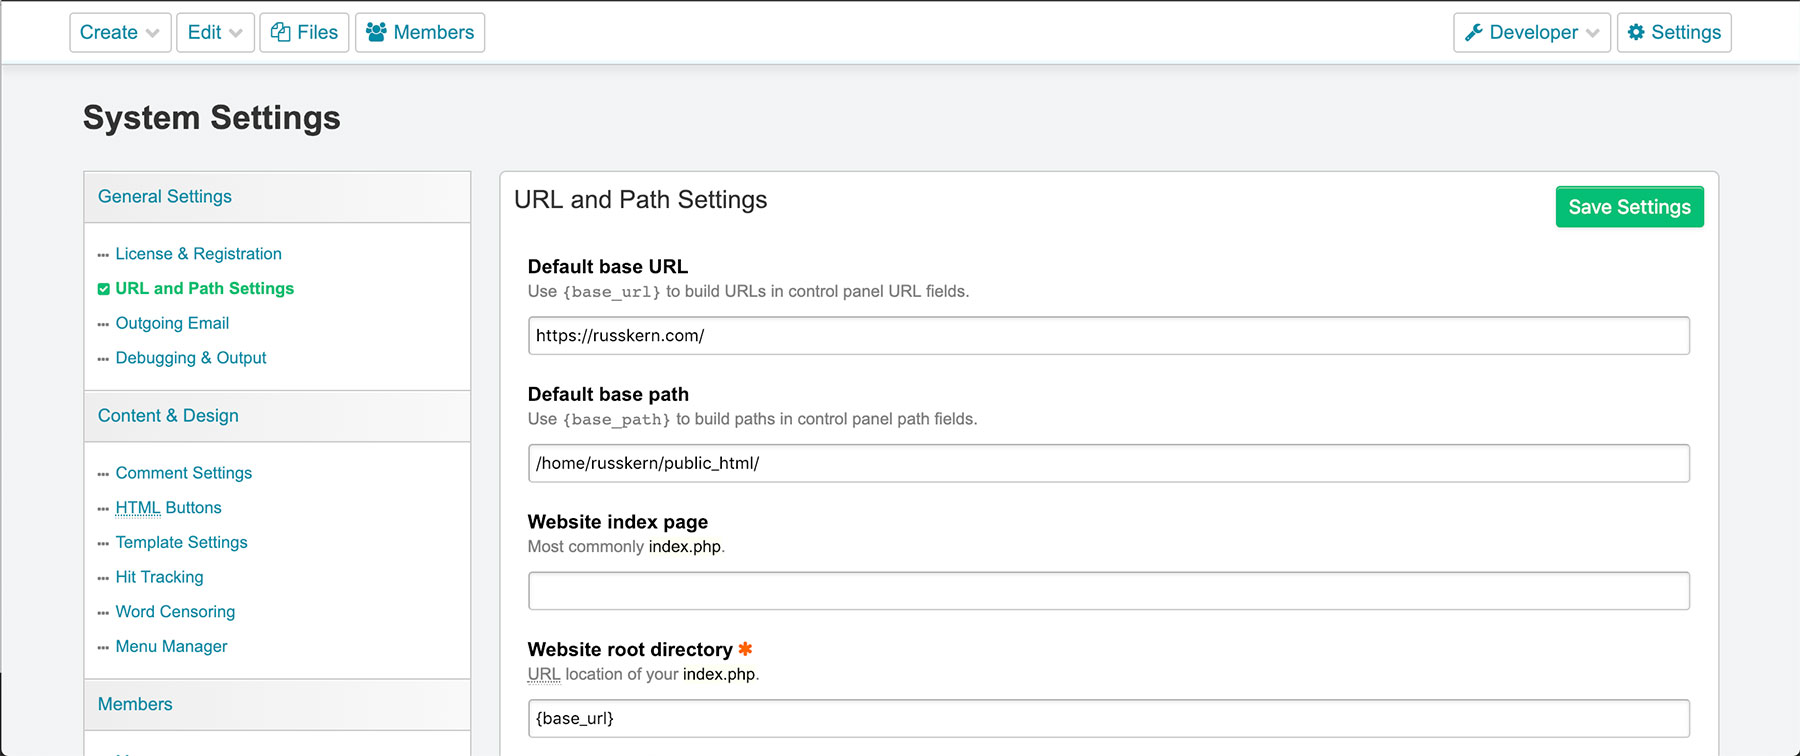
URL AND PATH SETTINGS
We aren’t going to make any changes here, but I want to point out a couple of key things that make life VERY easy with ExpressionEngine. In my experience, ExpressionEngine is very good at sniffing out the correct url & directory paths of your EE installation. For a basic set-up these work perfectly. What it does for you is defines these on this page and assigns then to a couple of EE template tags: {base_url} and {base_path} that you can then use in the Control panel (in areas such as Image directory paths or any other location that requires a path. this keeps you from having to remember them every time and, when/if you need to move your site, you simply make a change to this setting & it is applied site-wide. Pretty. Slick.
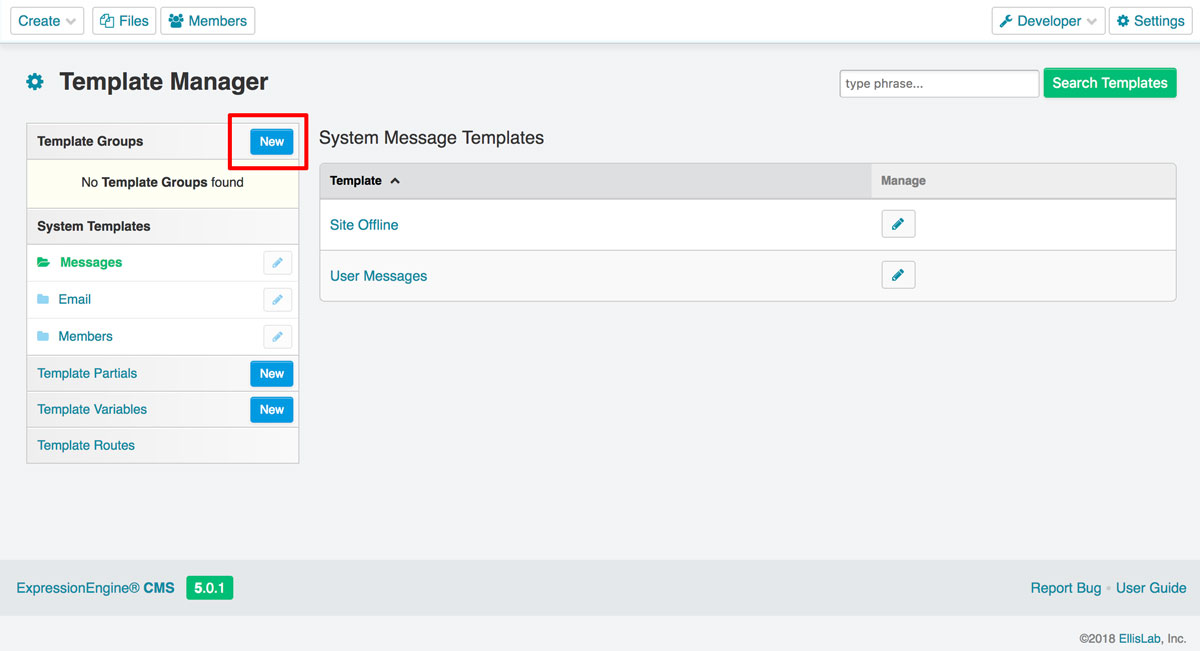
CREATE A TEMPLATE
Now that your environment is set up and you have done your most basic settings, first thing we’ll do is simply create a page. No Channels or anything else, Just a page template. The power of EE is that you can do as little or as much work as you like. Although there isn’t much reason for anyone to only create an html page & nothing else that is exactly what we are going to do for starters.
All you need to do (minimally) to establish your single page is venture into the Developer Tab -> Templates and click the “New Group” button on the left. Create your First Template Group and call it Site and make it the default page for your site.
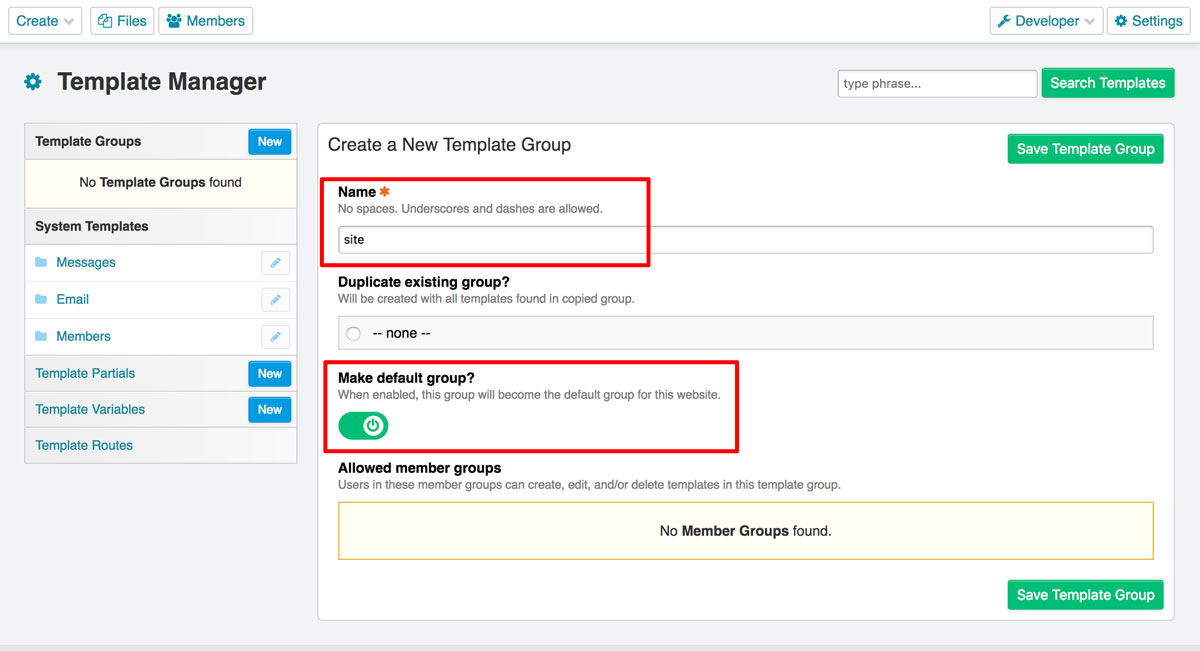
Thats it! In it’s rawest, most basic form, you now have a single page (although blank) ExpressionEngine webpage.
Now, want it to NOT be blank? Do this: Head over to https://getbootstrap.com, and about 1/3 of the way down the page is a starter template. Copy that template, then go back into your ExpressionEngine Control Panel, then Developer -> templates -> and click on your “Site” template group. Click “Edit” next to Index.html and paste the starter template into that editor. Now save it and then visit your site.
hope that illustrated how simple Expression Engine can be on a basic level. From this point we are going to continue building on this tutorial to make out pages more robust and flexible.
At the end of this we simply chunked all of our page code directly into the Site template. While you could build a site this way it’s not very practical. In the next tutorial we’ll look at using Layouts & Embeds as 2 ways to create reuseable page layout elements.